


Did you think AirPods are only suitable for Apple products? Yet, you can easily connect them to Windows computers. Although, as expected, you will not have the same seamless use experience that you would have using only Apple devices, learning how to connect your AirPods to a Windows 10 laptop or desktop is not at all difficult.
So let’s see the steps:
- Enable Bluetooth on the Windows 10 device you want to connect with.
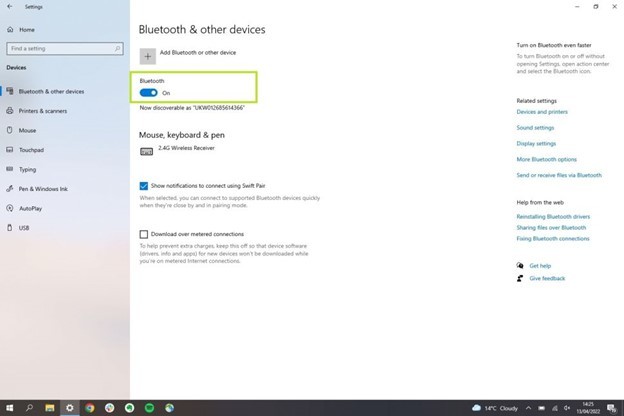
By clicking the “Start” button, search for “Settings” and then “Devices”. Here you will also make sure that Bluetooth is enabled.
2. Add a new device.
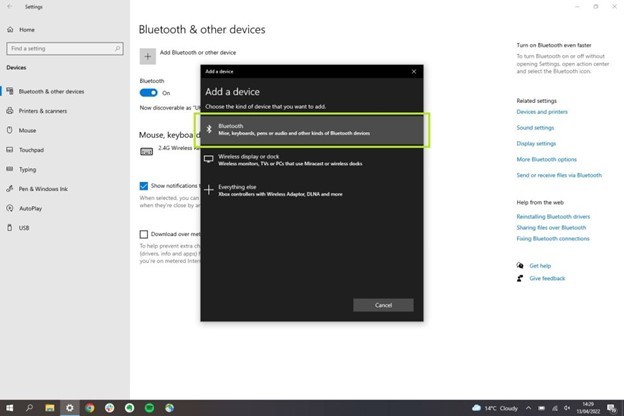
Select the field “Add Bluetooth or other device”, which you will find at the top of the page. After you select it, a new window will open, where you will choose the Bluetooth option.
3. Connect your AirPods.
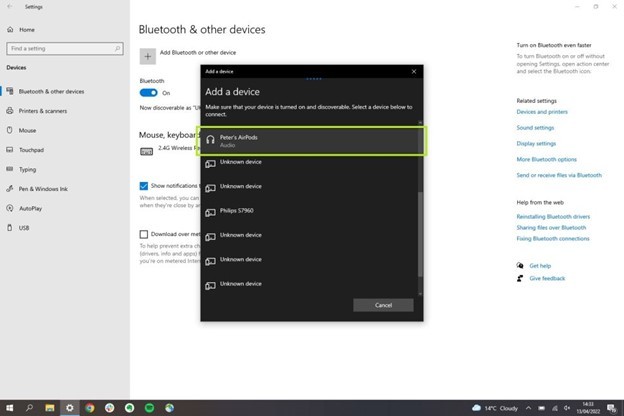
Put your AirPods in their case. Close the cover and then open it again. Hold the white Setup button on the case until you see the case’s LED blinking. At this point, you should see your AirPods appear on the device’s menu on your computer screen. Once you select them, you are ready!
Unfortunately, in Windows, you will not be able to use the automatic switch as it would occur between Apple devices. If you want to reconnect with your AirPods from your mobile device, you will need to do it manually by selecting the AirPods from your phone’s Bluetooth menu. If you move away from your computer while the earbuds are connected, they will automatically go to other devices that were previously connected and are within range, such as your iPhone.


